Here's a guide on rendering a matcap texture of surface normals (and normal maps) in Blender!
To get started, here's the resulting image of surface normals as a matcap texture. I don't know why it's nearly impossible to find this online, so if you're just here for that, you're welcome.
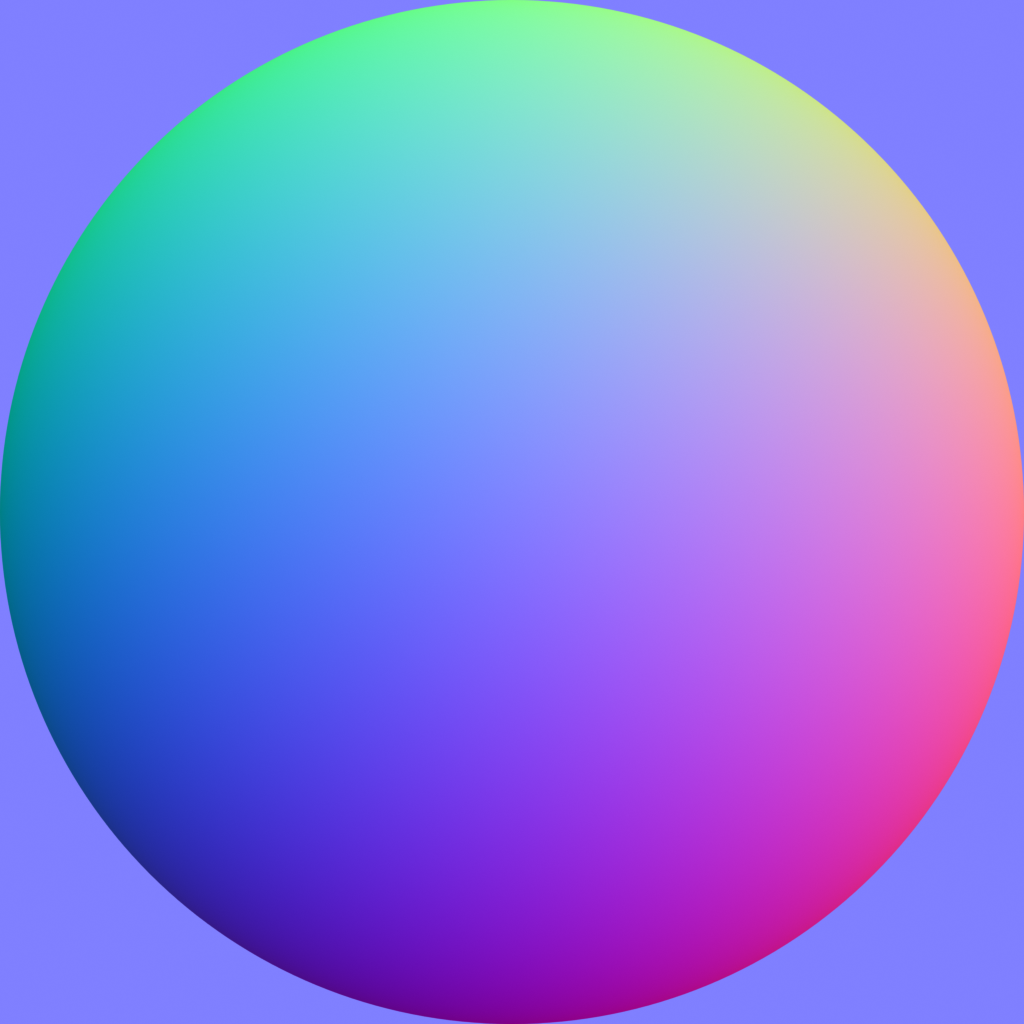 The elusive surface normal matcap texture.
What are surface normals? Matcap textures?
Surface normals refers to the direction a given point is facing on a 3D model. Matcap textures are images that can be used to colour a mesh based on its surface normals. (Usually relative to the camera.) If a point on a mesh is facing the camera, the normal value would be (X 0.5, Y 0.5, Z 1.0). A shader can be used to grab a colour from a matcap texture based on the X and Y values of the surface normal. In this example, the very middle of the texture would be used since X = 0.5 and Y = 0.5!
Why these colours?
Normals are often visualized as colours for modelling. When converting normals (XYZ) to a colour (RGB), the example value above would become (R 0.5, G 0.5, B 1.0), which gives the blue seen in the corners and very middle of the previous image!
Why do all this?
- It's useful to have in situations where you can't just program a shader to return normal values directly. (e.g. VRChat's Mobile shader limitations)
- This surface normal matcap texture is useful to have when testing matcaps and checking normals in other 3D software.
- It can be used as a palette for digitally painting a normal map directly! Here's a video about this technique.
- Instead of using a sphere and a plane to make a matcap with the process below, you can instead use any geometry you want to create a normal map from that!
- Additionally, I just think it looks pretty as a matcap texture itself...!
 I'm using the above matcap for the glasses on my VRChat model!
How do I do it myself?
Even though I've already provided a texture at the start of this post, you might want to have a material that directly draws normals, use this technique to make a normal map from geometry, render it at a higher resolution, whatever! So here's the setup!
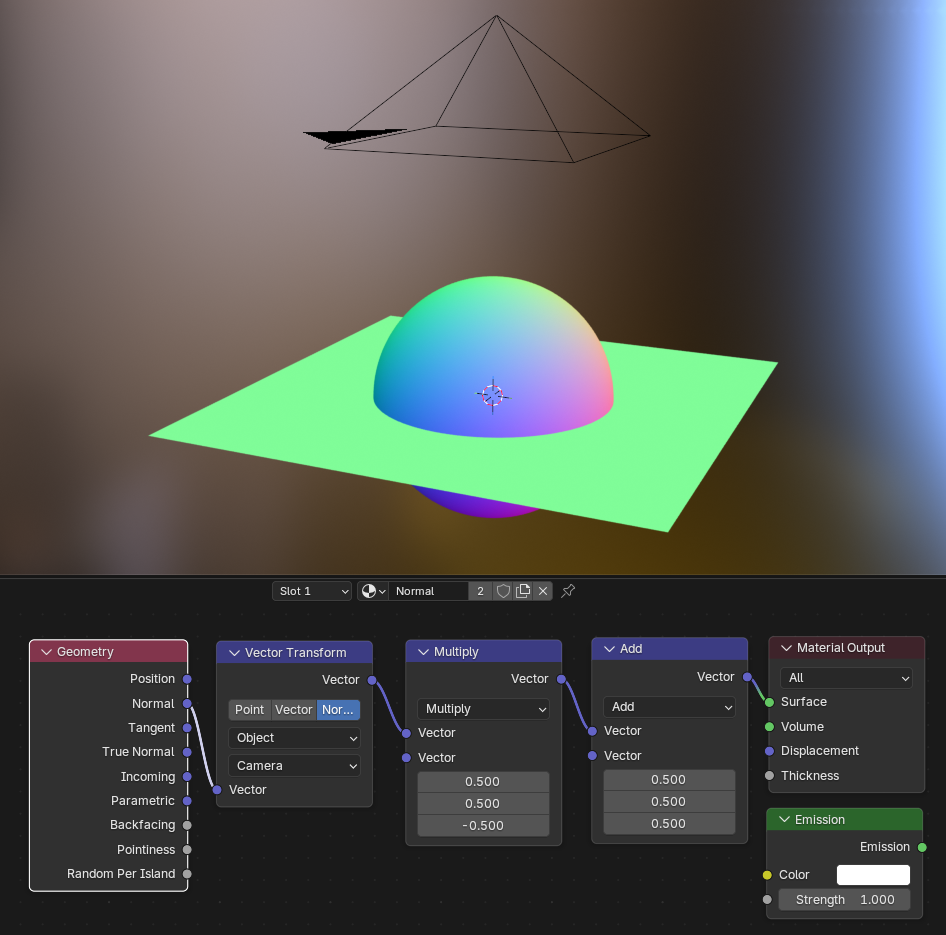 Shader and scene setup.
In Blender, I've created a high-poly sphere and a plane, and placed them at (0,0,0). I've enabled smooth shading on the sphere, and placed the camera directly above, looking down.
Next, I add a material (which can be shared between the sphere and plane) and edit the nodes on the shader to be like the above image. I'm skipping Emission since I'm just outputting a colour directly... but you might want that before material output for some situations.
The Vector Transform node moves the normals from object to camera space. The Multiply and Add nodes scale and shift the normals to be useful as colours.
Now all that's left is the project and camera properties to make sure the colour and output is correct.
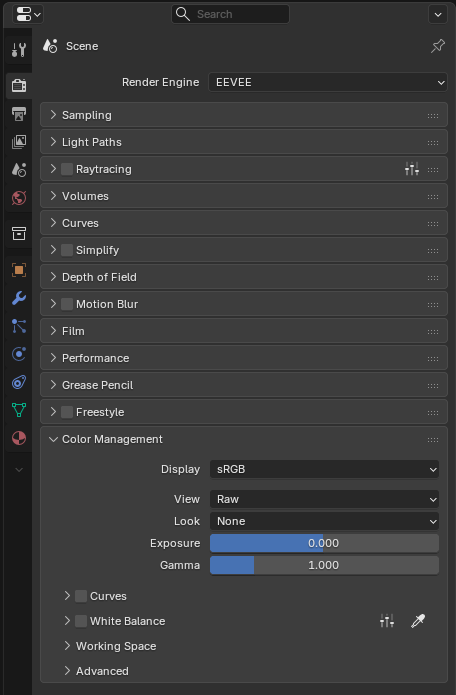 Render properties tab.
First, the render properties for your Blender project. The change here is to set the view to "Raw", so this can be copied by the camera settings.
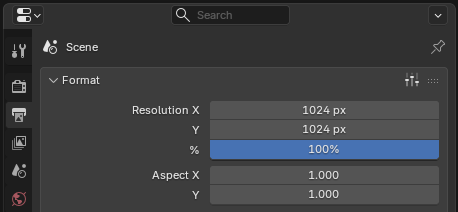 Output properties tab.
Next, the output properties! Set it to something square, ideally a power of 2, so the camera will render a texture of this size.
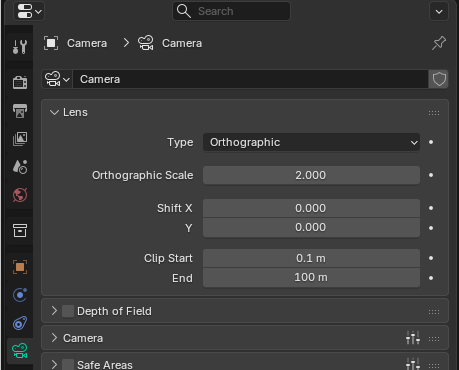 Camera properties tab.
The camera itself is set to be orthographic, and sized to fit the sphere.
Then, just render, save the result, and there you go! Well, now you know how to do it yourself. You can use this setup to render a normal map from meshes, too. Or most likely just grabbed the matcap at the top and left the page. Is anyone reading this? Hello.